2015 April

From the monthly archives:

April 2015

Any creative soul who is trying to commit to their passion professionally will know exactly what I am talking about. However, for those not so much involved here is little insight into usual frustrations, progress and process of any designer, maker or artist.

Truth is that this post is mainly for me! Usually talking about my technical and aesthetic issues with my fellow making friends helps me to overcome most frustrations. However, this time it is different. I am on six month adventure, living In Bali and traveling Indonesian’s islands and my creative network is far away. As some may say I am on holidays, not to stress about it, it is not so easy to do. Most of my creative friends are the same. There are no holidays for creative people. Especially, when you are trying to make living out of it. There are ideas constantly flowing, but time to realize them is very limited so you try to make most of any given time.

So for those interested to know this is how my coconut jewellery range is going and how I predict to go. If you find my feelings and experience familiar, funny or new and you would like to share your frustrations, experiences and solutions please leave a comment on this site for others to read too.

I personally find stage one really exciting. It is when initial idea is developed, followed by some more work through more developments and then taking it even further to final design. Realizing what my materials are can be equally fulfilling as they often relate back to concept and once you source them you can get started. I love this moment of enlightening and who doesn’t? It feels like one just has discovered new planet and is just working on presenting it to others.

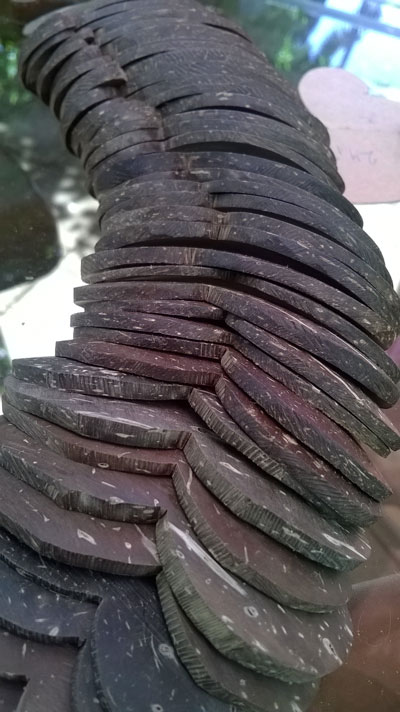
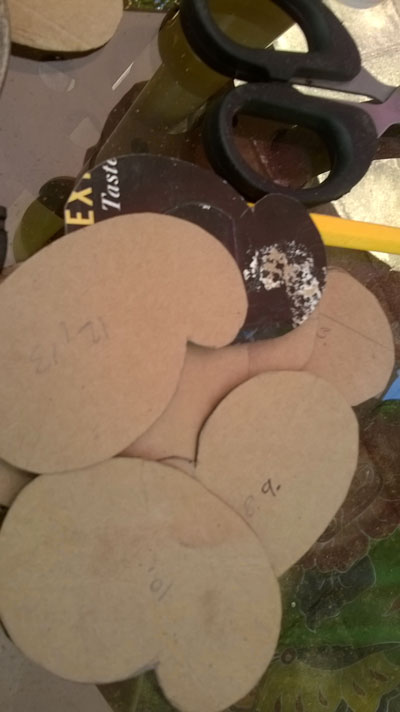
Stage two, collecting coconut and cleaning coconut was still exciting. You are getting slowly your hands on and can not wait to start cutting the real stuff out. At this point one is really tempted to skip production of sometimes necessary mock ups. These mock ups can be vital tool to resolution of correct proportion, technical issues etc.

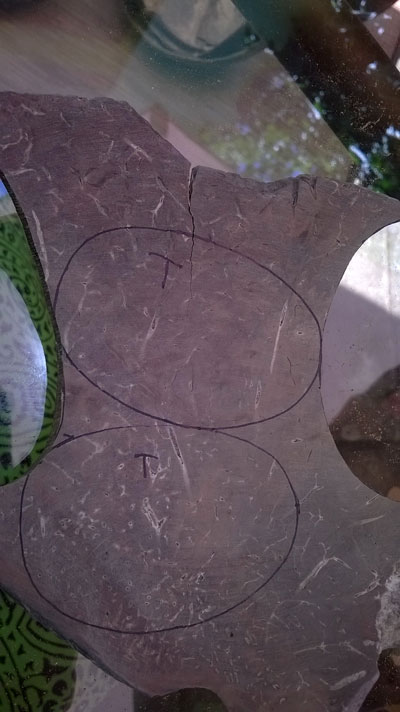
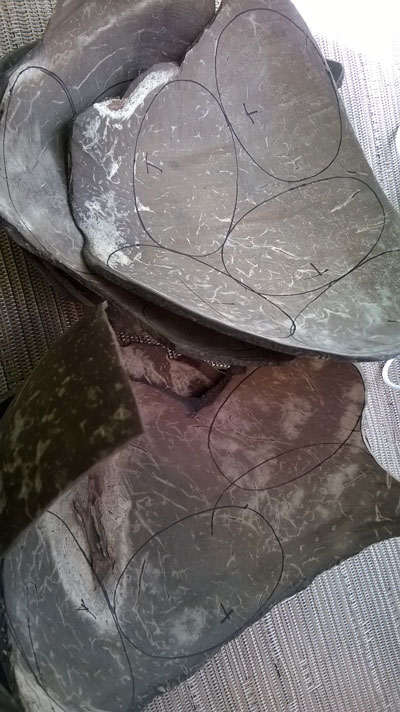
Stage three, so I have three kilos of cleaned coconut shells. I have basic shapes for first neckpiece cut out and now I am revaluating the whole idea! Suddenly, I am not too sure about it! I am trying to keep calm and not to panic yet! I am reaching stage when I am looking at the piece in progress more than I am actually doing something with it. I am sure that it just needs more time and work for it to start looking cool………right?

Stage four – life gets in the way – At this stage I really want to sit down at my bench and JUST DO IT! However, my long time planned trip to Singapore, Lombok and Sumbawa has started two weeks ago and I can’t do anything until I return home. I am having more doubts as I can not see the piece (as I left it at home)……. I am about to panic and the only way to keep calm for me is to write a work plan, do more drawings and research  so when I get back I don’t waste any time! I am thinking about it all the time even when I am hiking, swimming, diving or surfing. I know I am on holidays, but…….

Stage five – I can only predict at the moment as I am still in Lombok- upon my return to Bali and finding new place to live I will probably spend first week non-stop making.  Nothing will be more important.

Stage six – work in progress will start looking as something. At this stage I expect my boyfriend and friends to start making comments such as; “aha this is necklace” or “oh, yeah, that looks cool” rather than previous “what is it going to be?” or “ummm, hmmm”

Stage seven – I will finish the work – but anytime I will show it to anybody I will be pointing out my errors rather than just promoting my work. Also, I will be waking up in middle of the night to improve bit here and bit there. I will be bit over it, but the work in my eyes won’t be perfect so I won’t be able to stop.

Stage eight – I will not be able to look at it anymore so I will pack it away and hope that when I pull it out next time it will miraculously be what I want it to be.

Stage nine – I unwrap the work weeks later and it does miraculously look better……..by then I would forget about the errors and if I would see them fixing them would be much easier with fresh eyes and new energy.

So this is where I am at right now and my prediction how it will go based on my past projects. I will keep you informed on progress!!

{ 2 comments }

you can imagine how overwhelming it can be visiting one of many art or local markets anywhere in Indonesia. Beautiful textiles of any colour and technique can be found on every corner. Price can range anything from $2 to $200 depending on materials and if it was handmade and how well can you bargain. In Indonesia probably each of many islands has their own style of weaving. Each style is unique, but can be also extensively similar.

I got intrigued by this fact and so I decided to find out bit more about weaving techniques in Bali. For that I visited community in Seraya (North East Bali coast) producing textiles in their traditional way using only natural dyes.

This community was started by organization called Threads of Life (based in Ubud) promoting conservation of this traditional craft, fair work conditions and pay. They have found experienced women in the area who still produced textiles in traditional way and got them to teach younger who could carry it further.  Today, there are 100 people of all ages working in the community. Men, women and kids work here between their other commitments such as farming and school (kids). This program not only secures survival of the craft, but also helps locals to generate extra income.

Incredible detailed textiles take up to several months to complete depending on the pattern and material.  Traditionally, in Bali, it was mostly cotton used for weaving. However, also banana and other fibres are used.  Before one gets to weave the thread needs to be made and dyed and that is also very lengthy process.

1.     Cotton bolls needs to be harvested

2.      Cotton bolls needs to be cleaned from stones and other impurities caught in the fibre. Sort of wooden mill is used for that.

3.      Cotton is placed on sort of bow and vibrated to transform it into nice and light fiber.

4.      The cotton fiber is rolled with wooden stick into longish shape reminding me cigar except white…..

5.      The cotton stick is transformed into thread

6.      The yarn of thread is boiled in water for one day

7.     The washed yarn is boiled in a dye for a day or more

8.      colour is fixed in vinegar for 1-2 hours then rinsed in water and dried

9.      The dyed dried yarn is  span onto a spool

10.   The spool is used for weaving

There are lots of similarities in this weaving technique to those I used to observe done by my grandmother when I was a child. The weaving device is little bit different but principle is the same.

What I got fascinated by though was a production of the natural dyes. All colours are available from nature and it is interesting to learn which plants can be used for what. In this community they used following ingredients, but in other places you can find different plants to be used.


Blue – indigo plant leaves

Red – root of morinda mixed with limestone (red colour requires to dry for two weeks before it is submerged into vinegar for fixing)

Yellow – skin from pomegrande

Black – rust (rusty metal is submerged in a water for up to one year and then used as black dye). Apparently coconut fibre can also be used for black.

Brown – shidawaya flower

Pink – sichang wood

Cream – beetle nut

Green – blue and yellow mixed together


This was just a brief insight into craft with very long tradition.


{ 2 comments }

Before I left Sydney to go to Bali, I made a promise to me that I would try to learn textile craft of batik. At the time I believed that at least one of the batik techniques would origin in Bali, therefore, I thought this is the place to do it. I was wrong. Batik in Indonesia actually originated in Java, neighbouring Indonesian island. Truth is there is many batik techniques and you can buy representations of most of them here in Bali, but most of them are imported from other islands across Indonesia.  What is typical for Bali, though are weaving techniques, but about that I will talk in my next post. At local markets as well as textile boutiques can be purchased batiks of all sorts of level of craftsmanship and difficulties. The cheapest once are stamped on factory made cotton just from one side and can cost anything between $2-10AUD (depends how well you can bargain), those more expensive are hand painted with wax on hand woven fabrics made of cotton or silk. Price can go anything from $70-800AUD depending on material, size and complicacy.

What I wanted to learn is, of course, was everything. Unfortunately, I wasn’t able to find anybody  yet that would be willing to teach me more than what I can learn in very common commercial 4 hour batik workshops designed for tourists. I will keep looking!

So in the class I took in the mean time I have learned one of younger techniques of batik – colet. My teacher Kadek was really lovely, unfortunately his English was slightly limiting, therefore at times, answers to my questions were slightly confusing, yet I will try to describe the process of this basic technique as well as I can! When I learn more about other more complex and older techniques, I will share it with you.

Here it goes;

  • Tools used for this technique are simple and only a few. You need a little camping gas stove, canting – tool used for application and distribution of the wax (it comes in three sizes for different levels of detail and thickness of line), wax which can be bee’s wax or resin from trees, dyes (originally people would use natural dyes subtracted from native plants and trees) and cotton “buts” of different sizes for dye application.

  • As usual you start practicing on scrap paper to get used to handling canting. Of course canting looks super easy when done by a master, however, not so easy when you try for first time! I had particularly problems with dripping and even flow of wax! Let me just say, I made quite a mess out of my work. The way to use canting, as I was told, is to hold your canvas/paper on 45° angle and apply canting to it also on slight angle. You fill the canting only half way with the hot liquid wax and clean it on the edge of the dish containing the hot wax before you apply it to the canvas. Draw with canting with slight pressure. I found, the first contact of canting on the canvas the most difficult as the wax flow was always greater….I guess due to the temperature which of course decrease with time being out of the stove.


  • Before you start application of wax to your canvas you sketch your design on to paper. Fabric needs to be stretched onto wooden frame by simply pining it into it with push pins (I think any picture frame will do).
  • Followed by tracing the design on to the fabric lightly with pencil (what you do about the pencil lines on the fabric later on I don’t know as this question wasn’t answered to me……I guess, eraser could work. Or just draw freehand).

             I was bit annoyed as before I had a chance to say no suddenly I had a frame and BALI drown onto my canvas in wax!

  • Start chanting. Make sure that wax goes all the way through the fabric so you can see it on revers side of the fabric. If it doesn’t go through colour will blend. Once the design is contoured in wax on the fabric let it dry well.


  • Application of the colour is done with cotton buts of different sizes depending on size of space to be coloured in. if you like some colour blending wet the fabric first. Intensity of the colour is regulated by diluting the dye with water. When all is coloured in let it well dry again.

  • Now, the dye needs to be fixed in. I am not sure what exact chemicals my instructor used (again bit of communication problem), but I understood it was costic, water glass and something else.  I am definitely going to do this step differently.  I remember my mum used to bath dyed cloths in white vinegar to fix the colour. I will rather give a go to this method. Nevertheless, after this process fabric needs to be dried again.

  • Lastly, fabric is placed into boiling water to remove all the wax.

In conclusion, by the end of the workshop I was slightly demotivated as many of my questions weren’t answered. I would like to learn range of different batik techniques, more complex overlap of colours and making own natural dyes. I will keep searching for somebody to teach me!


{ 4 comments }