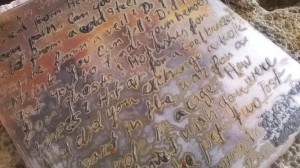
I have always been attracted to etching; however, use of nasty chemicals continuously prevented me from actually applying this technique to my work. You can imagine why the idea of storing nitric acid in my bathroom wasn’t very appealing.
It was about three weeks ago when I was thinking why not to simply use electro etching which is known as method that is easy and home and environment friendly.
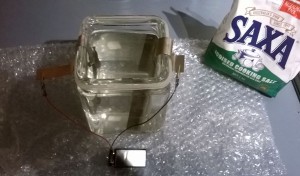
So I have looked it up and set up my very simple electro etching bath to do some experimentation on sterling silver using only;
9V battery
Glass container
Iodised sea salt (7g per 100ml of water)
titanium cathode
copper strip for anode
………. and it worked!!!
It seems that the trick is to leave silver in the bath for quiet long time. Also it is important to consider size of the metal to be etched.
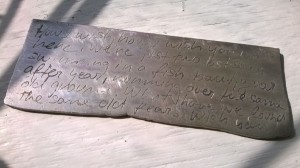
First I tried smaller piece of silver about 60x30x2mm large which I left in bath overnight then recharged the battery and let it etch for one more night. The result was great, nice deep bite.
Due to successful completion of the first piece I have decided to etch larger sheet of silver about 80x80x2mm. In this process not much was happening after first 24 hours so I have increased amount of salt and time and then finally achieved good results.
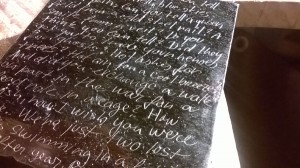
I guess, soon you will have a chance to see some of this technique in some of my new work but for now you can check out my progress images of this technique.
Step 1 – apply resist, let dry and scratch design/text in to its surface.
Step 2 – prepare silver for connection. Connect copper strip to back of silver to be etch in a way that there is as much connection as possible and tape well with duct tape (water resistant) so any liquid doesn’t get to it.
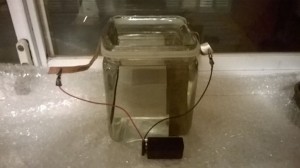
Step 3 – place titanium plate (cathode) and silver connected to the copper strip (anode) into glass container and pour salt water into it (it is best to dissolve salt in hot water prior to its application).
Step 4 – Connect 9V battery
Step 5 – check that you see bubbles coming up from the titanium (if there is no bubbles being produced something is wrong, maybe the battery is flat)
Step 6 – wait for very long time…….
Step 7 – remove from bath, wash and clean off all the resist with acetone, anneal and pickle.

